LinkedIn allows you to have a great degree of control over who can see what about you on LinkedIn. Especially in an era where there seems to be very little privacy, especially online, the focus on data privacy you see with LinkedIn is quite valuable. However, many people still don’t know that they can proactively manage this or simply don’t know their LinkedIn privacy settings options. Understanding how LinkedIn uses your data and controlling this through privacy settings is crucial.
For instance, there are ways to use LinkedIn privacy settings to minimize the number of sales pitches you get. Even with LinkedIn’s aggressive privacy policies and limits on the ways your information can be used for commercial purposes, this is quite valuable. With that in mind, let’s look at what options are available, and how to use them.
Accessing Your LinkedIn Privacy Settings
As with other social media networks, your account options are located in one place. There are many options to choose from, and two ways to access your settings. If you aren’t already browsing your LinkedIn, then type in this web address: https://www.linkedin.com/psettings/. You’ll need to sign in if you haven’t already, then the settings will be available to change.
Your other option is to click on the Me icon next to your profile picture in the top right of your home page. Then, select “Settings & Privacy.”
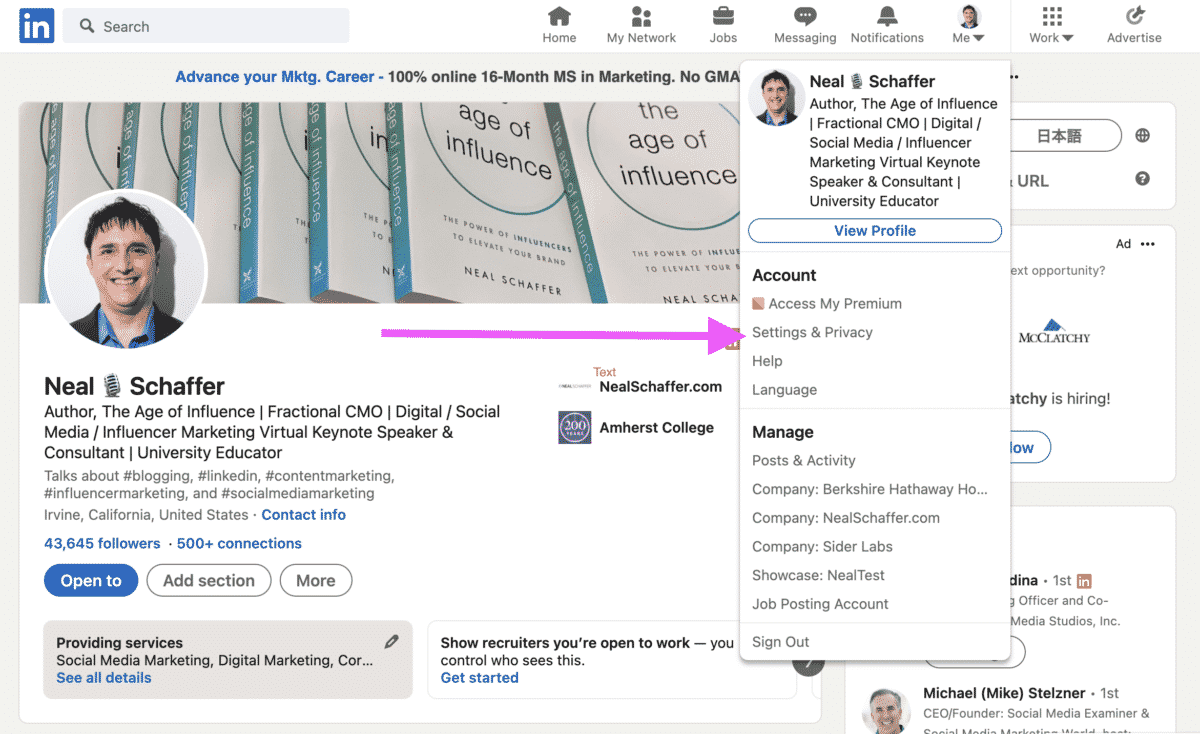
This will bring you to the same page that I mentioned above. No matter how you reach the settings page, you’ll see that while many LinkedIn privacy settings are the same type of preference you’re used to seeing, while others are different.
Here you can find various privacy options to control who can see your activity feed, manage data usage, adjust profile viewing options, and more.
Here are the Most Important LinkedIn Privacy Settings
There are currently more than 70 options to manage in your LinkedIn account privacy settings. Some are more important than others. These are the critical ones you should be proactively managing, as they make a big difference in account security and overall visibility on the platform. These will be talked about in order in which they appear on the menu inside LinkedIn privacy settings and the exact location will be indicated in parentheses after the item for your convenience.
1. Sync Contacts (Account Preferences –> Syncing Options)
Syncing contacts and managing data is convenient to know when others in your network join or are already on LinkedIn. This option also helps expand your LinkedIn network, which is especially important on LinkedIn due to messaging restrictions. You can find the URL here: https://www.linkedin.com/mynetwork/settings/manage-syncing/?trk=psettings_manage_contacts_prefs
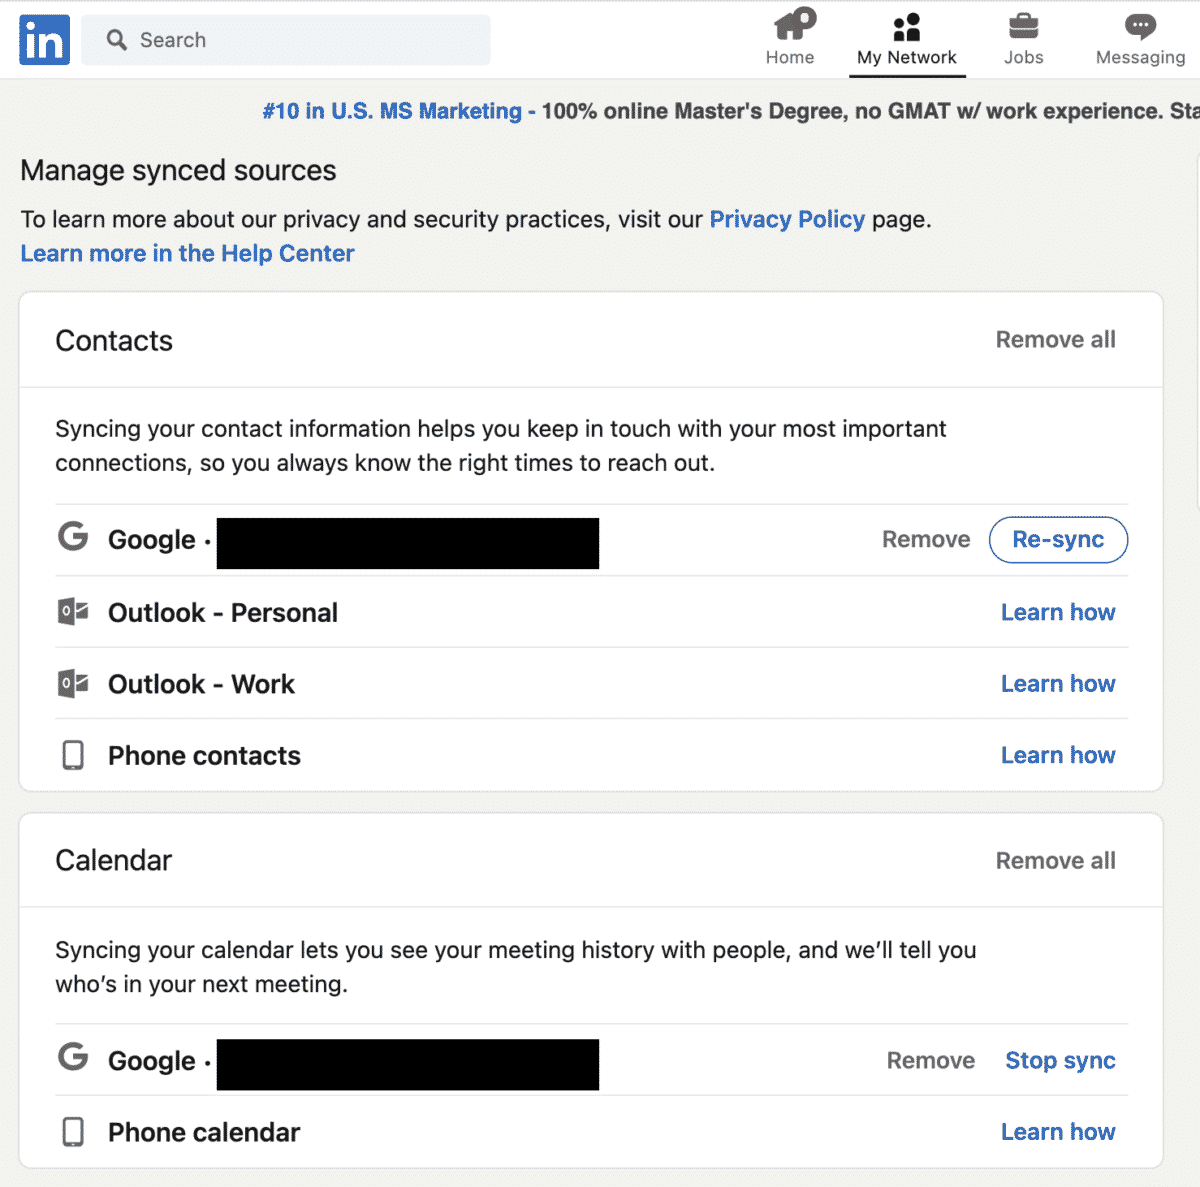
From here, you have the option to sync data with three basic sources: your Google account, smartphone, and Outlook (work or personal). Especially if you work from home, the sync option is a great way to keep in touch with clients, sales prospects, or other remote workers. Plus, if you’re looking for a job, increased connectivity can help reduce the infamous “phone tag” with hiring managers.
2. Email Addresses (Sign-In and Security –> Account Access)
If you want to be found by as many people as possible, make sure that you add as many email addresses that you have access to as possible – the earlier you start the more benefits you have in the future. Just for clarity, these are YOUR email addresses that are being added (or addresses you manage, with permission). You can find email settings here: https://www.linkedin.com/mypreferences/d/manage-email-addresses
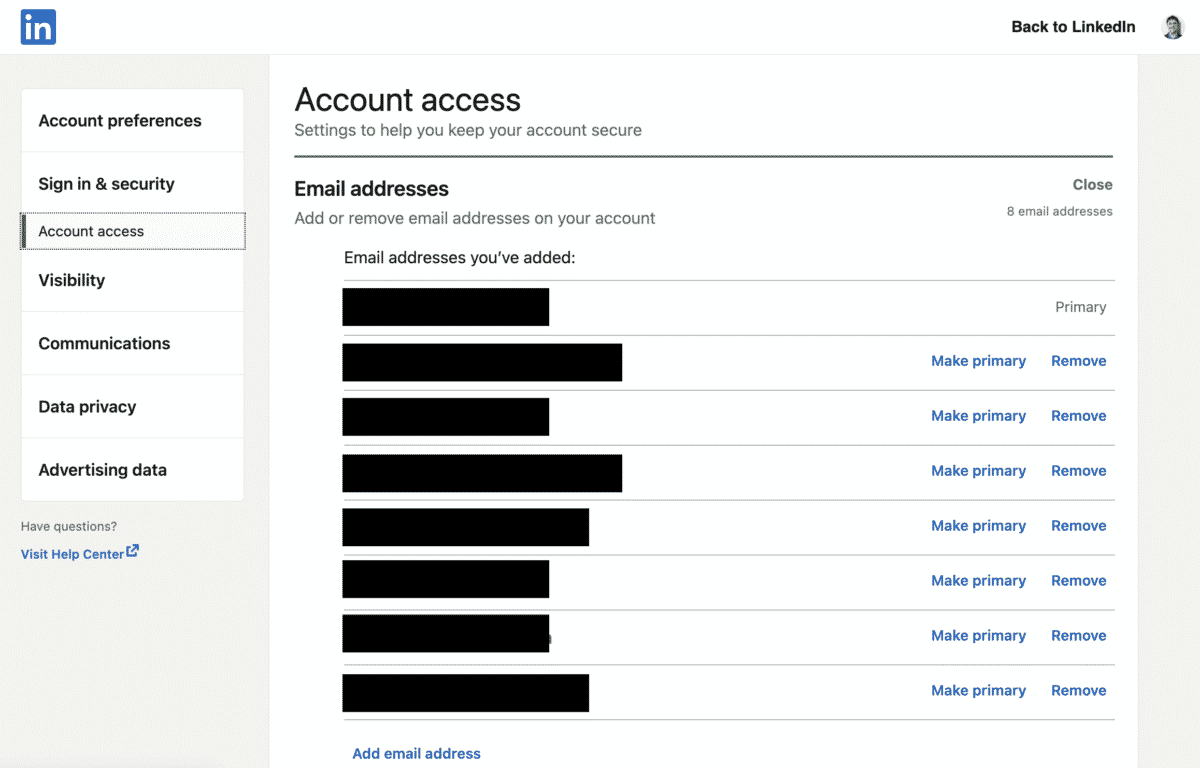
That’s easy enough, but how do email address LinkedIn privacy settings work? In a couple of different ways. First, people can use your email address to find your account and access your profile information. Especially if you have a common name, live in a larger area, or often get confused with other people with similar names, this is a major bonus. By using your email, potential connections can get “just you” quickly.
The other benefit of adding email addresses is that you can more easily require that a potential new connection know your email address. If you leave one or more of your email addresses out of the LinkedIn privacy settings list, then people who only know that one won’t be able to pass the challenge. In practice, this means that you’re passing up potential connections who could be valuable.
3. Two-Step Verification (Sign-In and Security –> Account Access)
This is critical to keep your account safe in case someone accesses your password on the dark web and tries to log in to your account. It’s true that a lot of people don’t like two-step verification. If you don’t want to use that, I always suggest that you use a strong password and change it regularly, which is what we all used to do way back before two-step verification was an option. You can find the setting here: https://www.linkedin.com/mypreferences/d/two-factor-authentication
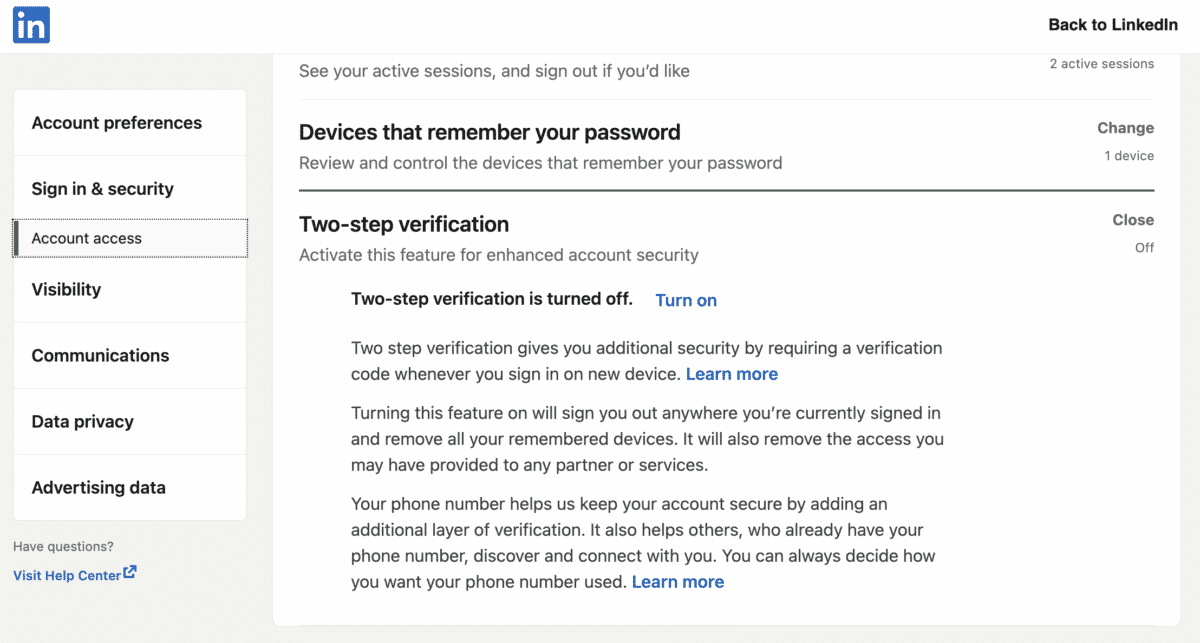
Once on this page, you can select the two-step verification method. This requires you to punch in a security code when signing on with a new device or mobile app. LinkedIn lets you receive the code through an authenticator app or text message (SMS). Both of these options, of course, require cell phones. Also, note that certain accounts, such as users of the recruiter and talent hub subscriptions, require this safeguard.
Further Reading: Why and How to Use LinkedIn Private Mode
4. Profile Viewing Options (Visibility –> Visibility of Your Profile & Network)
Did you know that you can decide whether or how you want people to see when you have visited their LinkedIn profile? When you want to be visible turn it on, and when researching competitors and you want to be anonymous, then turn it off!
Note that this is often called “how to activate private mode in LinkedIn” but it is one and the same thing. Here’s the link: https://www.linkedin.com/mypreferences/d/profile-viewing-options
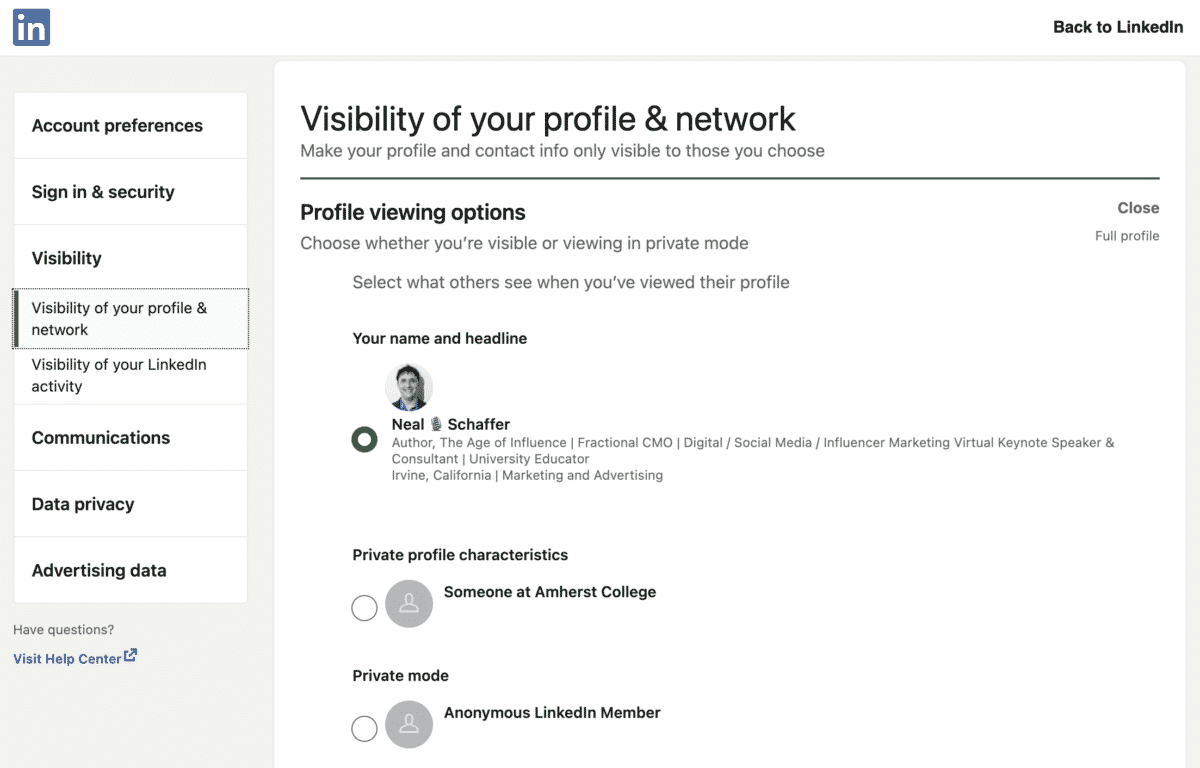
Under this heading, you’ll have three options. First, there’s fully visible with your profile, industry/job, and location. Second, you can be announced as “someone at (affiliation). Third, you can be completely anonymous. Each of these options has an important use, and you can change options as often as you need to. These visibility settings are based on your private profile characteristics, such as job title, company, school, and industry. If you choose to remain anonymous, it will erase your viewer history.
5. Edit Your Public Profile (Visibility –> Visibility of Your Profile & Network)
If you want to treat your LinkedIn profile as your default professional website, you’ll want to make sure that all of your information is fed to the search engines for maximum visbility. If you want to keep your LinkedIn profile page private, maybe you should reconsider why you are on LinkedIn – or social media? Of course, there is a middle ground between these options, but usually, some level of visibility is desirable. Here’s the link: https://www.linkedin.com/public-profile/settings
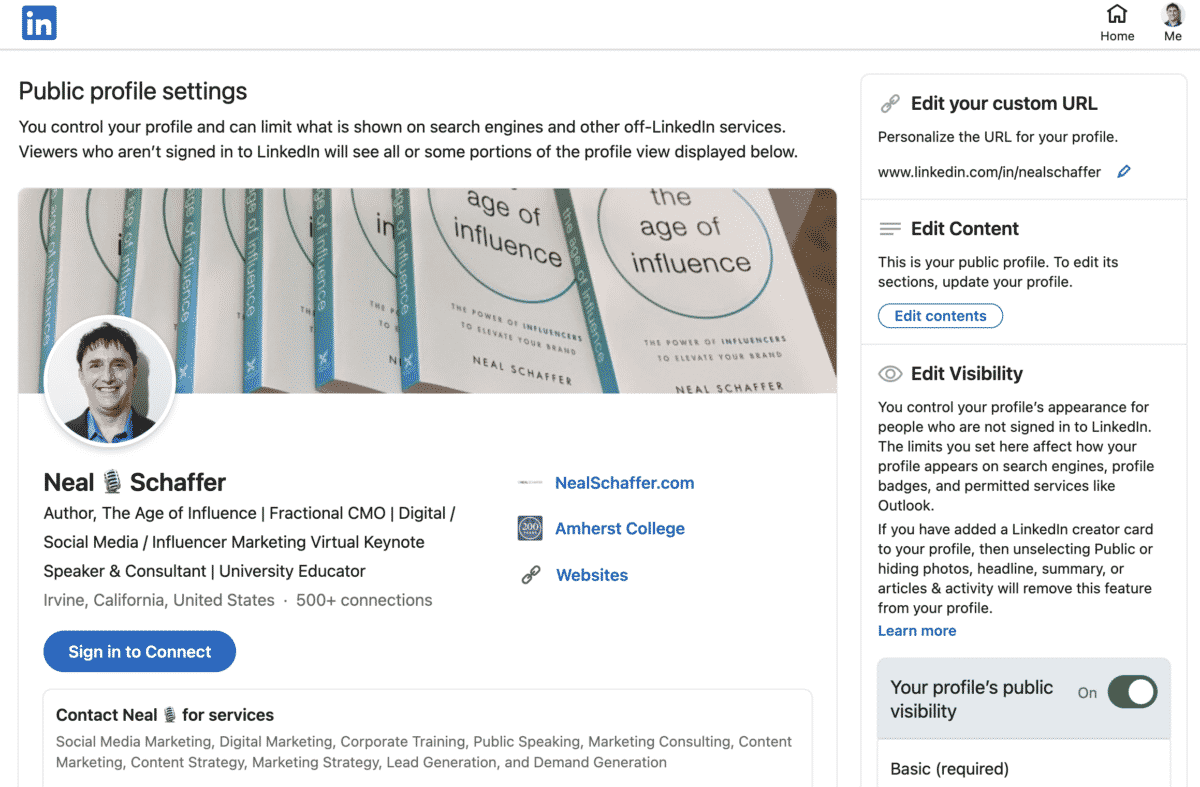
Here, you have several options. They range from only your contacts and close connections being able to see you, all the way to open access. With open access, though, you can set limits on how much is seen without a login. This can help mitigate privacy concerns in some situations. Or, if there are reasons why you don’t want people to know where you are short-term, putting the profile behind a privacy wall can be helpful. That’s because the location is automatic with any level of public access.
Is Your LinkedIn Working?
Just released: my new book to help professionals, entrepreneurs, and business owners maximize LinkedIn for real growth.
With years of LinkedIn expertise, Maximizing LinkedIn for Business Growth offers actionable steps to build your brand, expand your network, and drive results.
Start leveraging LinkedIn like never before—grab your copy now! Click the cover or button below to buy on Amazon.
Further Reading: How Do I Send a Complaint to LinkedIn?
6. Connections (Visibility –> Visibility of Your Profile & Network)
Did you know that if you are not careful, other users can click on your total number of connections and actually see who they are? If you are in sales, and one of your connections suddenly starts working for your competitor, they will be able to see who is in your network. For that reason alone, I always recommend that you do not let others view your connections. You don’t want to be seen as a walking Rolodex, do you? Here’s how to guard your network: https://www.linkedin.com/mypreferences/d/settings/connections-visibility

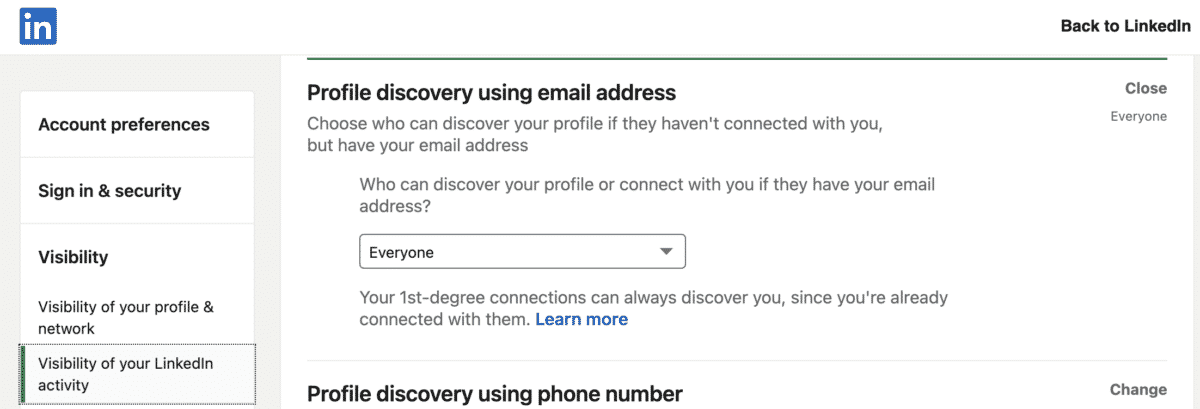
7. Profile Discovery Using Email Address (Visibility –> Visibility of Your Profile & Network)
I mentioned this aspect of LinkedIn privacy settings in 2. that you want to tie as many email addresses as you have to your profile. Related to that, you’ll want to make sure that you have this option ON so that others who have your email address can find and connect with you. So, as you add those emails, be sure to approve their use here: https://www.linkedin.com/mypreferences/d/settings/discover-me-by-email-address
8. Share Profile Updates with Your Network (Visibility –> Visibility of your LinkedIn activity)
Let’s say you make a small edit to your profile. Do you want everyone in your network – or your boss – to know? Probably not. That’s why I recommend you turn this off. However, if you get promoted or change jobs, you’ll want to turn this on and strategically leverage it to inform your network of the good news! Here is where you can make this change to update your profile settings: https://www.linkedin.com/mypreferences/d/settings/notify-network-for-updates.

At the end of the day, the big question is whether or not something is newsworthy. Or, for that matter, if it is something that you want everyone else to know. In some situations, you might need to change your profile, but you don’t need all of your lurkers to take notice. This can be especially true if you are looking for a new job. Even sprucing up that profile might make an employer think you’re disloyal. That’s why it’s important to watch your LinkedIn privacy settings carefully.
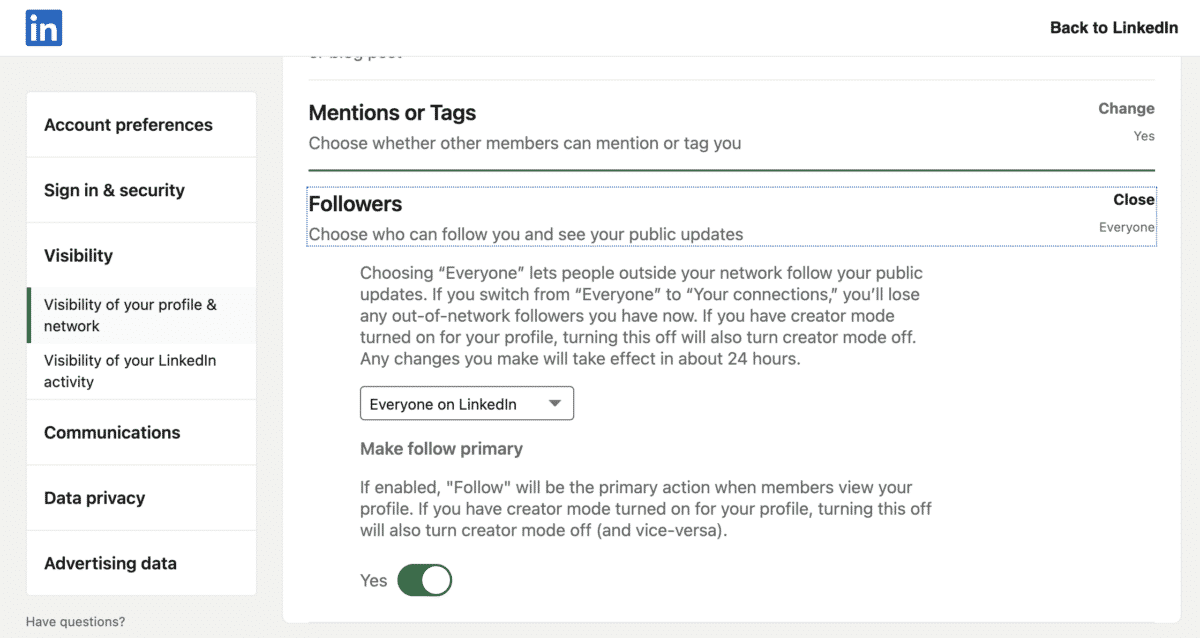
9. Choose to Allow People to Follow You before Connecting(Visibility –> Visibility of your LinkedIn activity)
If you were to go to my LinkedIn profile (https://linkedin.com/in/nealschaffer), you’ll notice that the default “Connect” button says “Follow.” If you want to implement the same for your platform you can do so in this setting. Why bother? I believe it makes people who really want to connect with you take the extra step and thus encourage a higher quality of connection requests.
Look at it this way: if you can only connect with someone, then people with an only passive interest in you will need to connect. This is especially true if your other LinkedIn privacy settings are high. The thing is, not everyone needs to be able to message you. For some people, keeping in touch can mean just getting your likes and comments (or blog posts). If they need to contact about a business opportunity, there are plenty of ways to do this besides LinkedIn messaging. Ready to try it? Click here: https://www.linkedin.com/mypreferences/d/followed
10. Manage All of Your LinkedIn Communications (Communications –> How You Get Your Notifications)
Some people complain that they get too many emails, notifications, or app pushes from LinkedIn. You can 100% control these and opt out of unwanted notifications here, which are actually 3 different privacy settings for each of the communications methods. Here’s the link: https://www.linkedin.com/mypreferences/d/categories/notifications
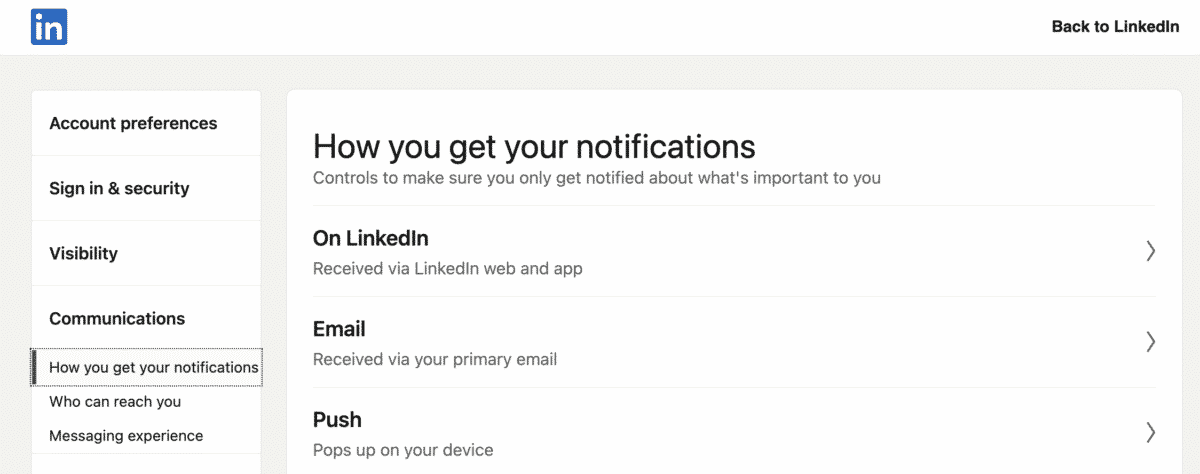
This set of LinkedIn privacy settings is actually pretty detailed. That’s because LinkedIn understands that not everything warrants a notification for everyone. In addition, the relevance of a particular notice type can be relatively narrow. To that end, there are detailed options in three groups: push notices (popup on device), app/web notifications, and emails. This helps you get what you need without it being too overwhelming.
11. Allow Others to Message You (Communications –> Who Can Reach You)
I believe that if you are on LinkedIn to begin with, you’ll want to make yourself as contactable as possible. Perhaps you disagree. Regardless, in this section of LinkedIn privacy settings, you can decide who can send you message requests, InMails, or Sponsored Messages: https://www.linkedin.com/mypreferences/d/who-can-message-me
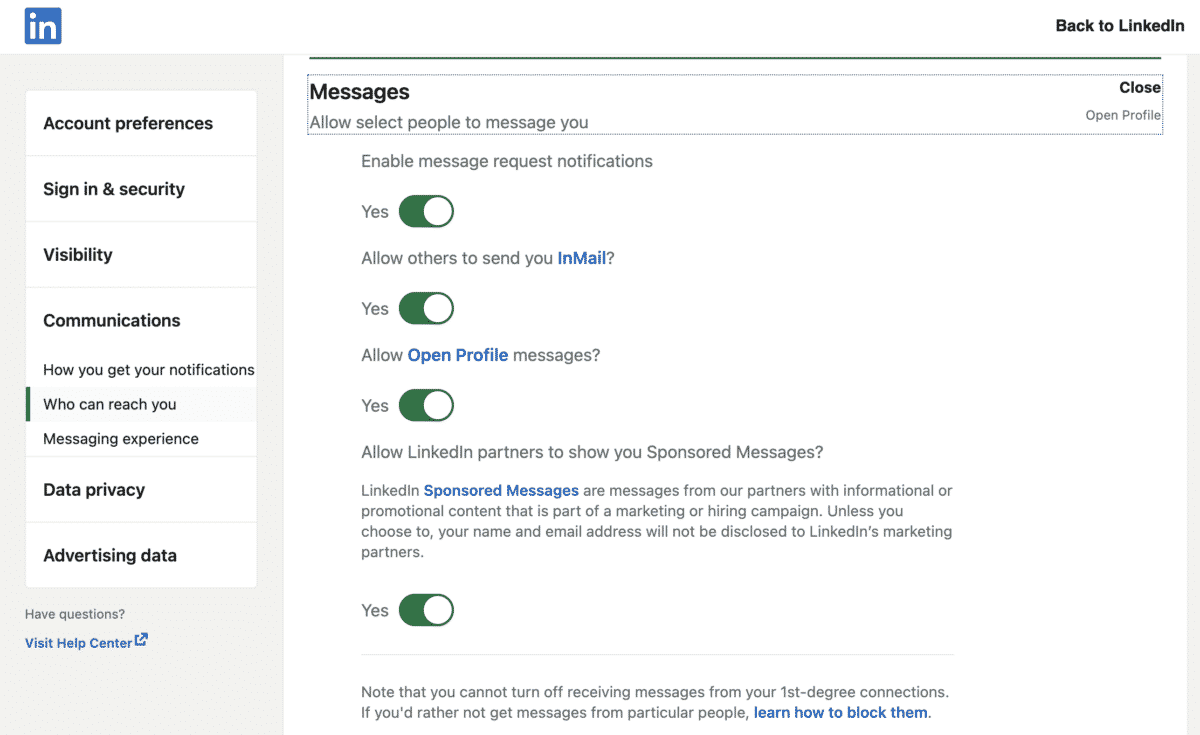
Of course, there are a few reasons why you might need to institute a few restrictions. For instance, there are some professionals who might find sponsored messages annoying. This would be especially true if they’re trying to change careers because the sponsored messages would likely be targeted ads based on existing experience or education. The other major situation might be where there are personal safety issues involved. For this latter circumstance, blocking an annoying person or stalker individually remains an option.
Finally, it’s worth noting that this section is where you can require someone to have your email address to send a connection request. If you’re using this option, make sure you have all active emails listed, to reduce the number of people who are excluded for giving the wrong one. With that said, I don’t recommend this for most people, because it makes you too difficult to contact.
It’s Time to Better Manage Your LinkedIn Privacy Settings
Knowing how to properly change your LinkedIn privacy settings is an important part of being on the network. In most cases, you want to aim for maximum visibility while also not getting overwhelmed. This way, you can benefit from the power of LinkedIn networking as much as possible.
Hero photo by Jason Dent on Unsplash


